What does Instagram verification mean
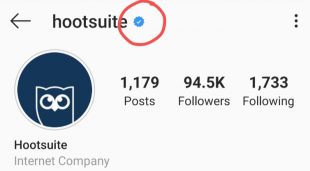
Instagram verification means establishing your Instagram account as the “authentic presence of a notable public figure, celebrity, or global brand.” An Instagram verified account gets a verified badge. It’s a blue seal with a little checkmark that appears next to your username. You can apply for Instagram verification with either a personal account or a business account.
The blue check helps people avoid imposter accounts and easily find the brands or public figures they want to follow. It appears in search as well as on your profile and in embedded posts. This helps people make sure they find the real accounts for the people and brands they’re searching for.
For instance, it can help you tell at a glance the difference between a celebrity account and a fan account for that celebrity. For brands, it can help avoid knock-offs stealing your thunder, and your followers.
Beyond that, though, it’s a bit of a status symbol. After all, according to Instagram itself, the verification badge is evidence that you’re “notable.”
Who is eligible to be Instagram verified?
The coveted blue check wouldn’t be coveted if it was easy to attain.
Instagram verification is reserved for accounts that Instagram deems “in the public interest.” More specifically, you must be a public figure, celebrity or global brand.
- Authentic. Obviously you have to be who you say you are. That is, a real person, registered business, or brand.
- Unique. Only one account per person or business can get Instagram verified, with exceptions for language-specific accounts. Instagram says it does not verify general interest accounts like meme roundups. Fan accounts also don’t qualify.
- Public. If you’re looking to verify your Instagram account, surely your account is already viewable to everyone, yes? While some brands have experimented with private Instagram accounts, these accounts do not qualify for verification.
- Complete. You must have a complete bio, profile photo, and at least one post.
- Notable. Again, Instagram stresses that verified accounts must “represent a well-known, highly searched for person, brand, or entity.”
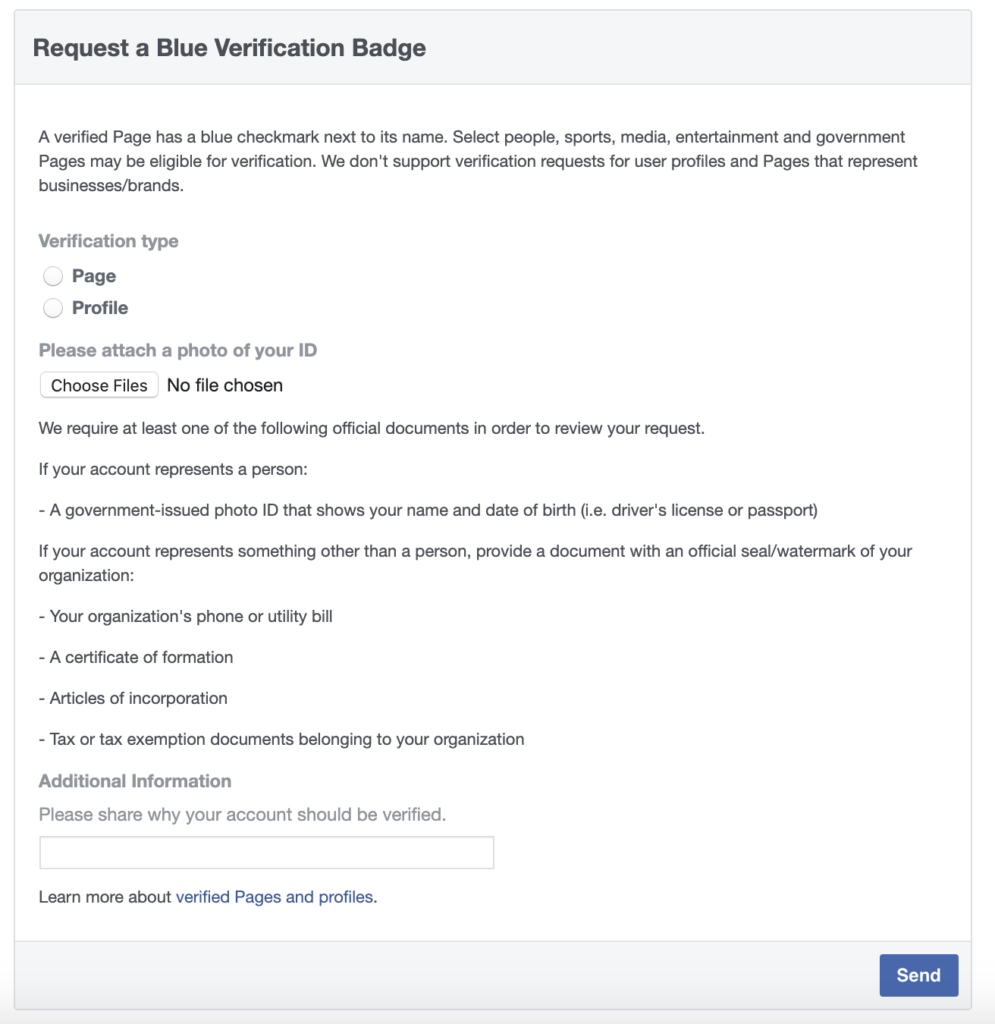
Even if you already have a verified badge on Facebook, that doesn’t mean you will be eligible to get verified on Instagram.
Getting verified on Facebook is easier.
Whereas Facebook grants verification small businesses and organizations, Instagram
says it will only grant a verified badge to “notable” accounts that are “in the public interest” and “have a high likelihood of being impersonated.”
How to apply to get verified on Instagram
Here’s the good news. Applying to get verified on Instagram only takes a few moments. Here’s how to do it in three easy steps.
Step 1: Log in
Log into your account. If you have more than one Instagram account, make sure you’re logged into the account you want to verify.
Step 2: Request verification
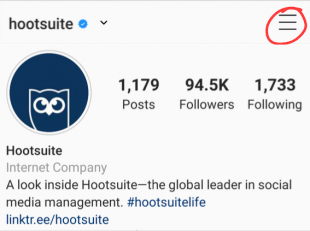
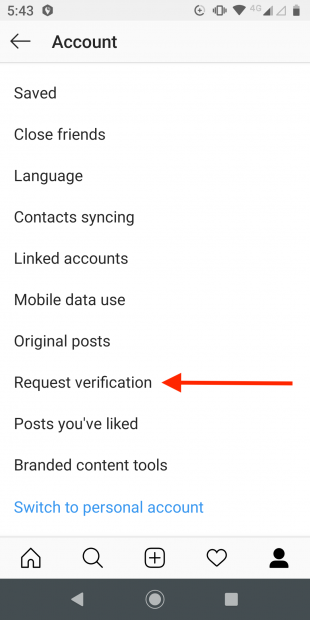
1. Tap the menu icon in the top right corner of your profile.
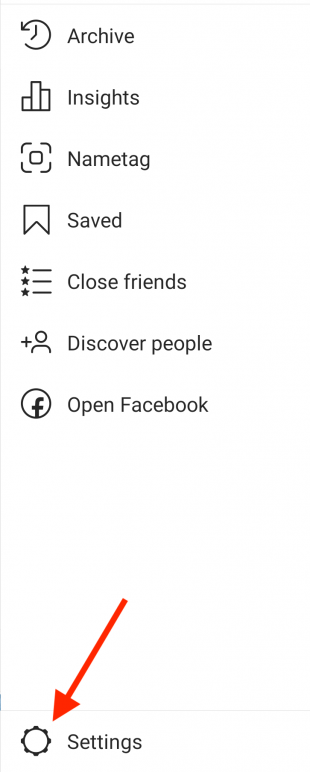
2. Click the Settings gear icon at the bottom of the screen.
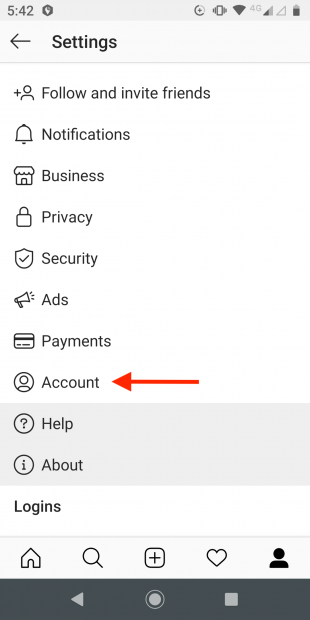
3. Tap Account.
4. Tap Request verification.
Step 3: Confirm your identity
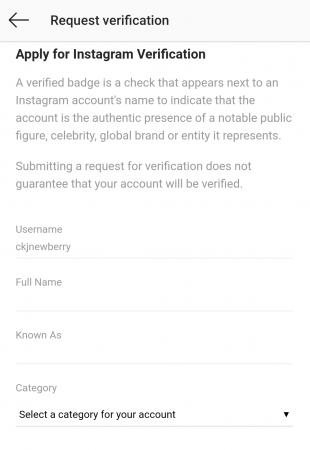
1. Fill in your Instagram account name and complete the following fields:
- Full Name: Your full, legal name, as it appears on your government-issued identification.
- Known As: This could be your name or the name of your company. Use the name that people generally know you as. For example, if you usually go by a nickname or use your middle name instead of your first name, enter that information here.
- Category: You can choose from news/media, sports, government/politics, music, fashion, entertainment, blogger/influencer, business/brand/organization, or other. Pick the one that makes the most sense for your Instagram account.
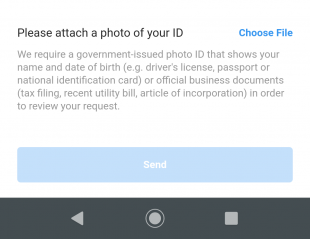
2. Upload a copy of your government-issued photo ID or an official business document. For an individual, you could use a driver’s license, passport, or government-issued identity card. For a business, you could use a tax return, a utility bill in your company name, or your articles of incorporation. Make sure the name on your document matches the name you entered above.
3. Tap Send.
Once you hit the send button, Instagram will review your application for verification. Among other factors, they will be
looking to “confirm the authenticity, uniqueness, completeness and notability” of your account.
After reviewing your application, Instagram will notify you whether your request is approved or denied. You’ll see the message in your Instagram notifications. But don’t expect a response right away. There’s no specified timeline for how long the process takes, but it’s generally at least a couple of days.
Keep in mind that Instagram will never ask you to pay for verification, and they will not send you an email asking about your verification request. If you get a request to pay, or an email to send more details, you’re being scammed.
Tips to get verified on Instagram: Dos and Don’ts
Now, the hard(er) part. Anyone can submit a request for Instagram verification. But Instagram is quite clear: “submitting a request for verification does not guarantee that your account will be verified.”
Here are some dos and don’t to help your application to verify your Instagram account have the best chances of success.
Do have a great bio
A complete profile is one of the things Instagram looks for when deciding whether to verify your account. Make sure you complete all of the
Instagram bio fields with accurate and relevant information about yourself or your business.
Do be honest
Make sure you are completely accurate and truthful in all stages of the Instagram verification process. Use your real name and choose an accurate category for your account. Most important, use a real document—with no changes or alterations—to prove your identity.
This should be obvious. But just in case you’re thinking about trying to cheat the system, know this. Instagram specifically
says, “If you provide false or misleading information during the verification process, we will remove your verified badge and
may take additional action to delete your account.”
Do be newsworthy
Instagram reviews each verification manually. One of the factors Instagram staffers check is whether the user is featured in
multiple news sources. How do you get featured in multiple news sources?
If you’ve got something newsworthy to say, try sending out a press release. Or try reaching out to local news organizations with information about what you do. If you’ve never been in the news before, a local angle is your best bet. From there, you can build to larger coverage. Post all relevant stories in a press section on your website or blog to give them a little extra visibility.
Keep in mind that paid or promotional content doesn’t count.
Do have a presence outside of Instagram
Even if you have lots of Instagram followers, it’s hard to make the case that you’re “notable” if you have no presence outside of Instagram. If Instagram staffers Google you during the verification review process, what will they find?
Make sure your website or blog is optimized to appear in search results. To grow your online presence, you could consider guest posting on other blogs or sites, especially if they are well-known and respected in your niche.
Do post regularly
The guidelines say that you have to have at least one post to be considered for verification. But, realistically, you should not apply until you have a more robust Instagram presence than that.
An inactive account is not a great candidate for Instagram verification. To boost your chances of getting the blue badge, make sure to post new content regularly. If you’re having trouble coming up with post ideas, check out our suggestions for
what to post on Instagram.
Do get your follower count up
There’s no longer a set number of required followers to get verified on Instagram. But, keep in mind that one of the requirements for verification is being “notable.” More followers is a key indicator of noteworthiness.
Another factor Instagram considers is how likely you are to be impersonated. No one is likely to impersonate an account with just a few followers. The larger your account, the more likely you are to be Instagram-copied. This makes it more likely that Instagram will want you to have the verification badge.
Don’t link to other social channels in your bio
Do not cross-promote your other social accounts in your Instagram bio, and especially don’t use your Insta bio to ask people to follow you elsewhere. Instagram says it won’t approve profiles that “contain ‘add me’ links to other social channels.”
Don’t use a third-party service to apply
Don’t try to get an inside edge. Just follow the steps above.
Instagram specifically
says not to try to verify your account through a third party. There are plenty of scammers out there who will try to sell you Instagram verification. Don’t fall for it.
Don’t give up after the first try
If at first you’re denied verification, take the time to improve your profile and grow your audience. Once you’ve made the necessary changes and further established yourself on the platform, there’s no harm in trying again. You can apply again 30 days after your first request is denied.
Don’t lose your badge once you get it
Once you get your verification badge, you don’t want to lose it. That means you need to continue to follow the terms of service and community guidelines.
In addition, Instagram may take away your badge, or even disable your account, if you transfer or sell your badge, or use your profile pic, bio, or Instagram name to promote other services. You worked hard to get that Instagram verification. Don’t run afoul of the rules and see it taken away.
How to show you’re authentic if you can’t get Instagram verified
Verification is not the only way to prove your authenticity on Instagram. We’ve got loads of tips for establishing a strong, credible presence on Instagram in our post on
using Instagram for business.
Here are some suggestions straight from Instagam itself. While these strategies will not necessarily increase your odds of getting verified, they do help make your account look more credible. That certainly can’t hurt.
Link from other official sources
Instagram
suggests linking to your Instagram account from other official sources, like your official website, your Facebook Page, or your YouTube or Twitter account. This is especially helpful if you already have a verified account on one of those other channels.
But remember: Don’t link to your other social channels from your Instagram bio.
Use your bio effectively
We’ve already said that you should have a complete and effective bio to increase your chances of verification. But it’s worth mentioning again here, because even if you don’t manage to get verified, a great description helps show that your account is authentic and credible.
Instagram
says you should use your bio to “tell potential customers more about your business.”
Go behind the scenes with Stories
Instagram Stories give you the chance to show the people behind your brand, and to give followers a chance to see what’s happening at your company in real time.
That kind of real brand insight is hard to imitate. That’s why Instagram specifically
suggests you boost authenticity by
using Instagram Stories to “provide a behind the scenes look at your business.”
Get followers involved
Engagement is always a good signal of authenticity on social channels. To further highlight your authenticity, Instagram
suggests that you encourage customers to tag your business in their posts, “so people can see posts from customers using your product or service.”




.jpg)

